If you are making die-cut stickers to sell, you will need to make sure they have a white outline around them. Once you have your design you can use a variety of ways to add the white outline to your die-cut sticker. I tested out a few ways to make the white border and in this article I will show you how to use Photoshop to add the white outline around your die-cut sticker design.
It really doesn’t matter what version of Photoshop you have. I have a super old version of Photoshop and it does the trick. You just need to make sure you have Blending Options and Stroke available.
I think this method much quicker than doing the Procreate method I see taught on TikTok. The Photoshop method of making the white outline for stickers only has a few steps. Procreate is a great program for those who like using a pencil but if you are a hard-core computer person like I am, and you would rather use your mouse, this is the technique for you.
If you prefer, you can watch the video I created to show you how to add the white border around your die-cut sticker using Photoshop.
Add the White Border Around an Image in Photoshop
1. Open Photoshop and then open your design file. You will need a .png image with a transparent background.
2. Add a new layer and drag it below the design. (optional)
3. Fill the new layer with a dark color. I like to use black (#000000) or dark grey (#333333). This allows me to see my image much easier so I know the white outline looks correct.
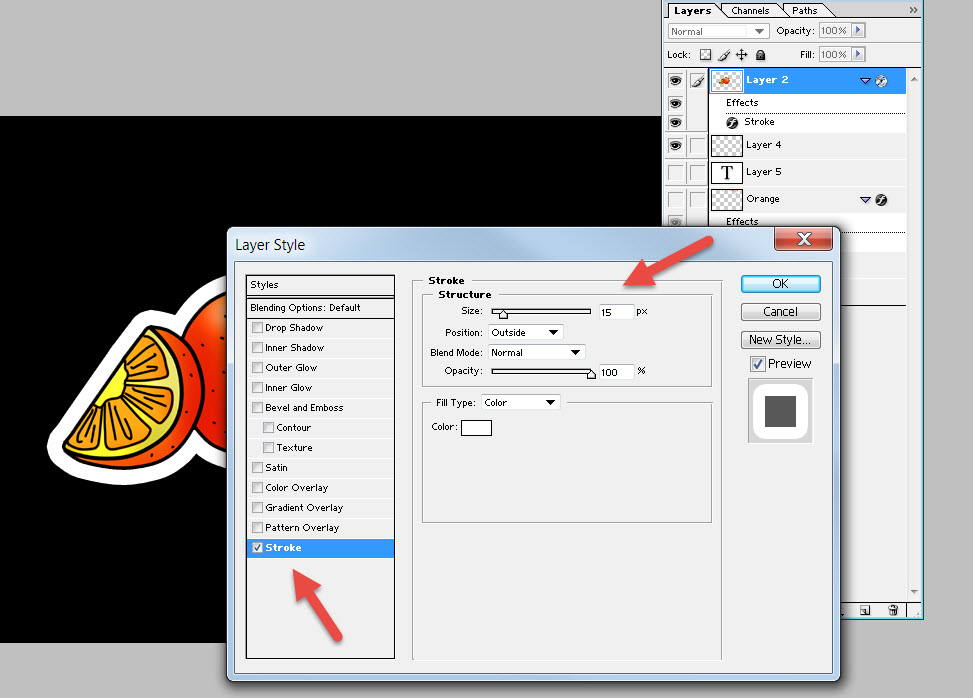
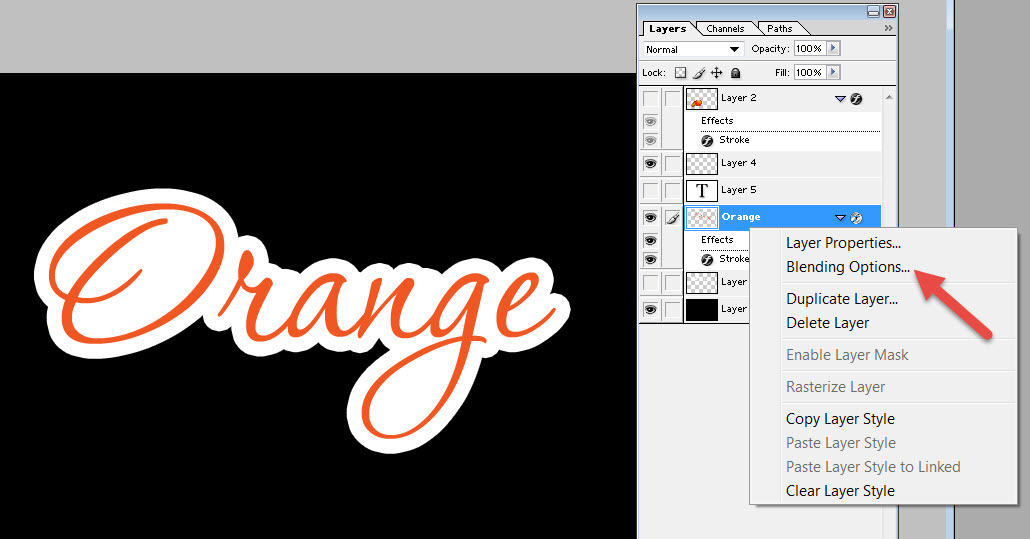
4. Right-click on the image layer and then left-click on Blending Options.
5. Click in the box next to Stroke.
6. Click on the color box and drag to select white or change the Hex color to #FFFFFF. Click OK.
7. Change the Structure size to a larger number. I like to use 15 to 20 px but it depends on the size of your image. Just play around with it until your white outline looks the size you want. Click OK.
8. If you have a simple image you are done. Just hide the dark layer and save as a .png file.
9. If you have a more complex image that is still showing some gaps, use the brush tool to fill in those gaps with white.

Add the White Border Around Text in Photoshop
If you want to add a white outline around a text layer there are a few things that are different.
1. Open Photoshop and create a new file or open an existing file that has your text.
2. You can leave the text layer as-is or click the Layers menu and then Rasterize. This turns your text layer into an image.
3. Follow steps 2 through 7 above.
4. If choose to Rasterize your text, press the B key on your keyboard to enable the brush tool. Make sure the color is white and the brush size isn’t too big. Fill in the empty areas of the white outline that didn’t get filled in with the stroke.
5. If you didn’t Rasterize your text, create a new layer, drag it below the text layer, use the brush tool with white and fill in the empty area to complete your sticker.


Leave a Reply