What are Gmail filters? Filters help you in a lot of ways. They help you organize your email so you can see what’s important.
These days we get a LOT of email. We get less email from our friends and family than we do from businesses, blogs and influencers we follow. Filters help keep everything organized so you can see what is important.
When you setup a Gmail account for the first time, by default the Inbox is setup with tabs – Primary, Social, Promotions, Updates and Forums. Gmail is using these tabs to help you organize but in my opinion that just make things more confusing because it is THEIR system and not your own personal system. Since we are all unique individuals a one-size-fits all opinion does not work but kudos for Gmail for trying to help.
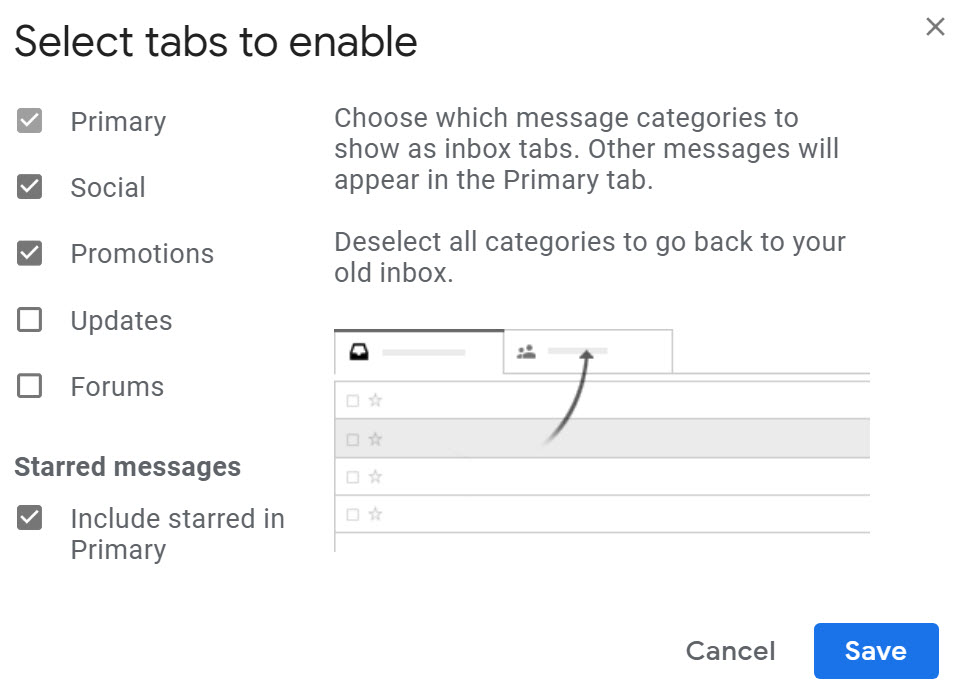
You can enable or disable these tabs. I highly suggest you disable all of the Gmail Inbox tabs and use Filters instead, which I will show you how to setup below.
Using Gmail Filters allows you to create your own system so you can label things the way you want to see them.
Here’s how to Create a Gmail Filter
Note: these instructions are for the computer and not smartphones or tablets.
There are two ways you can create a filter. You can create a brand new filter by going to Gmail settings or you can open an email and create a filter based off of that email type.
How to Create a Filter Using Gmail Settings
- Log into your Gmail account.
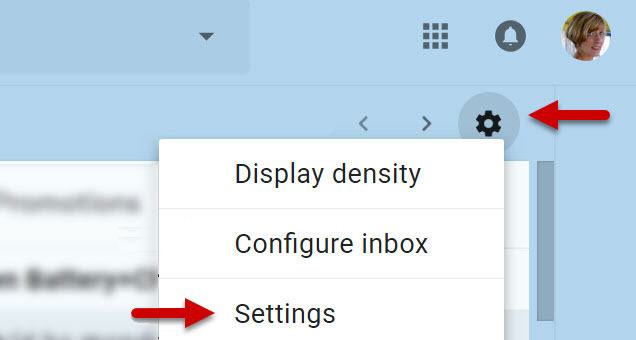
- Click the “gear” icon at the top right.
- Click Settings.
- Click the Filters and Blocked Addresses tab.
- Click Create a new filter.

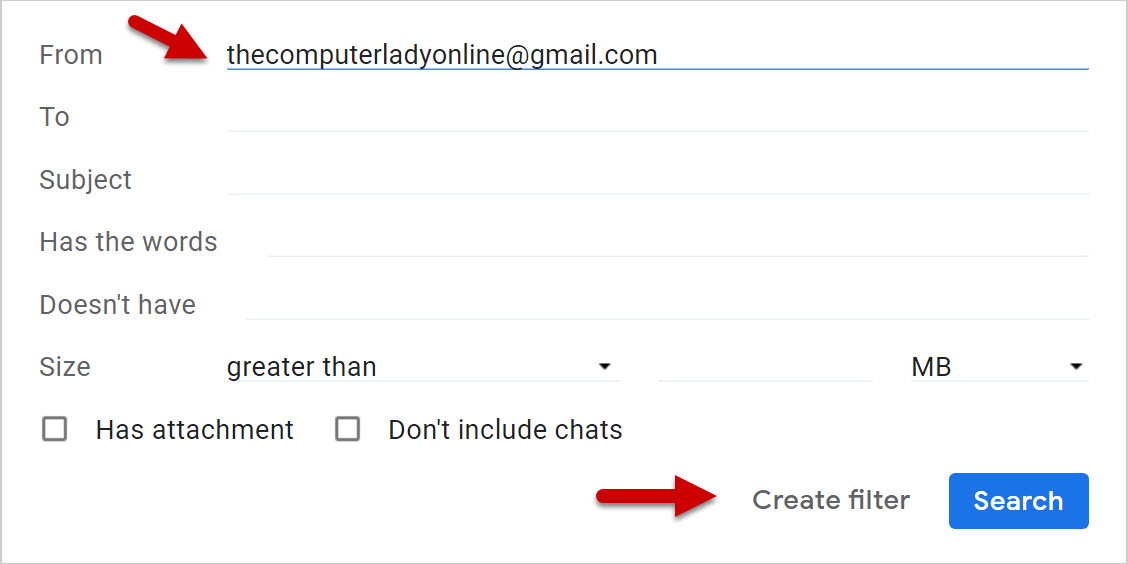
On the next screen you will decide how to filter email. Let’s create a filter based on someone who writes to you a lot.
- Type the person’s email address in the From field.
- Click Create filter.
The next screen is where you tell the filter what to do with email from that person.
I suggest you do the following:
- Skip the Inbox.
- Apply the Label.
- Apply to any existing emails from that person.
By skipping the Inbox, any future emails from that person can go directly into a folder (category) you create. You do this by creating a label, see below. If you already received emails from the person you are adding you can select those by clicking the “also apply filter to” message so those will be moved to the new category once the filter is created.
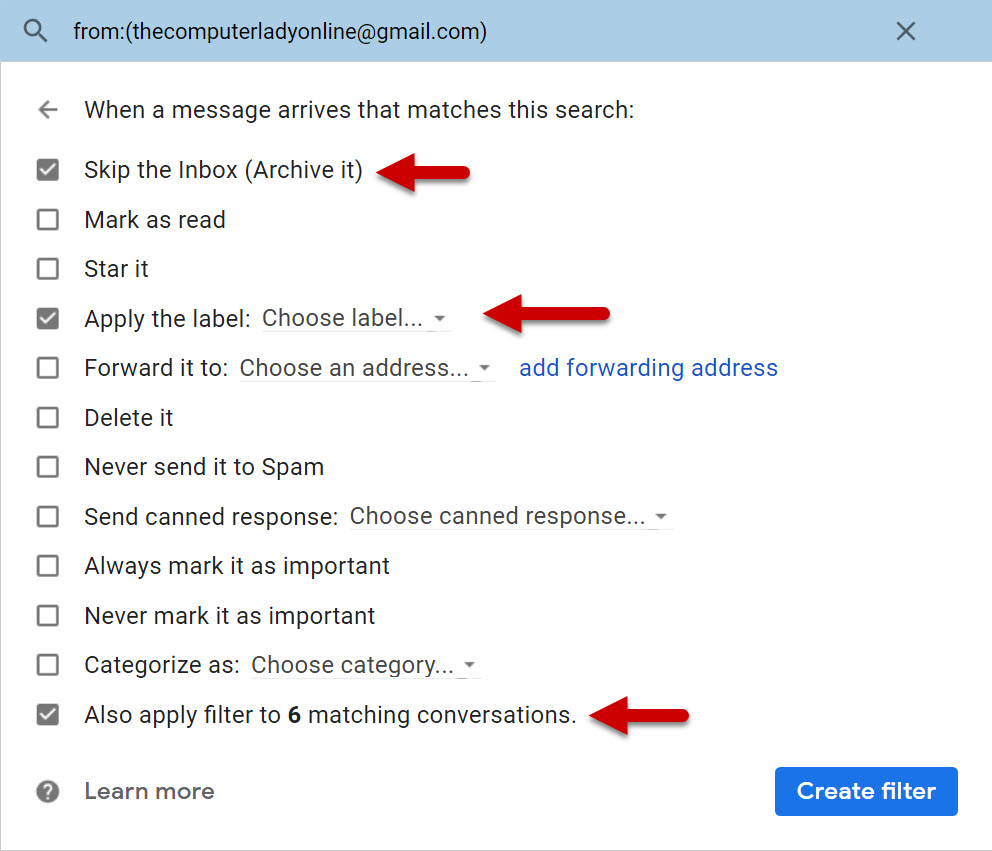
Click the checkbox next to each one of those items and do not click Create filter just yet. Let’s look at the Label option.
Click Choose label…
If you created labels in the past you will see them on this list and can just choose one to use but if this is your first time creating a filter you won’t see any listed.
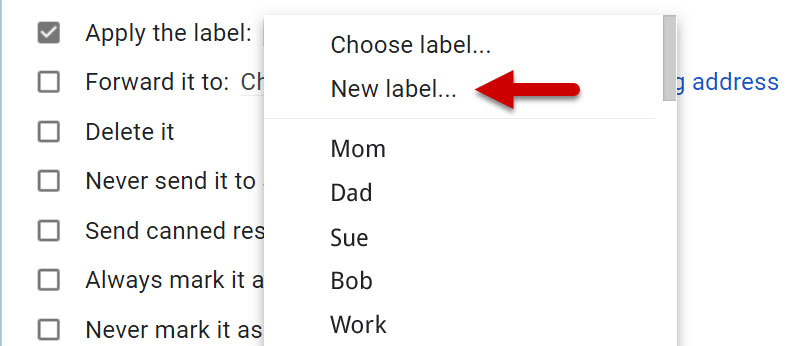
Click New label…
Type the name you want to give the Label. Make it easy to remember. Friends, Family, Mom, Dad, Bob, Work, Club, etc.
You can also create a master label and then later create sub-labels under the master label. In our example Computer Help would be the master label you would create first and then you would go back and make a sub label with The Computer Lady and click Nest label under Computer Help.
For Example: You may want to make a master label of Family and under it make sub-labels for each person in your family. Here are some examples of master labels and labels nested under them.
Family >> Mom
Family >> Dad
Family >> Sue
Family >> Bob
Friends >> Frankie
Friends >> Suzie
Work >> John (Boss)
Work >> Mary (Human Resources)
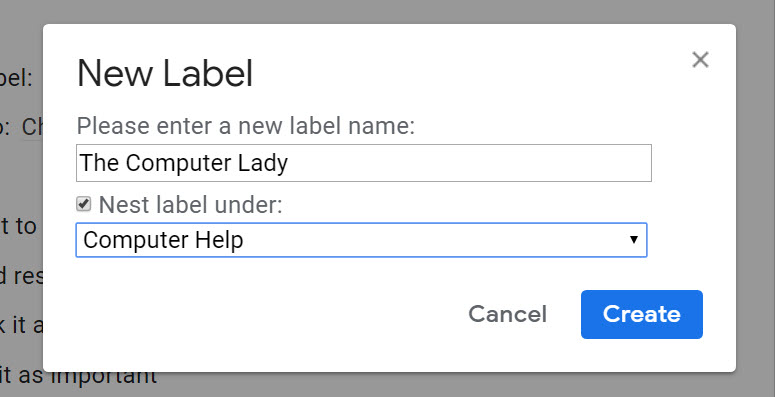
Click Create. You can see that the Label you created is showing next to the “Apply the label: checkbox

Now you can click Create filter.
The filter will now show up on your Filters page and you can edit it or Delete it as needed.

Create a Filter Using an Existing Email
If you received an email from someone and want to create a filter follow these steps.
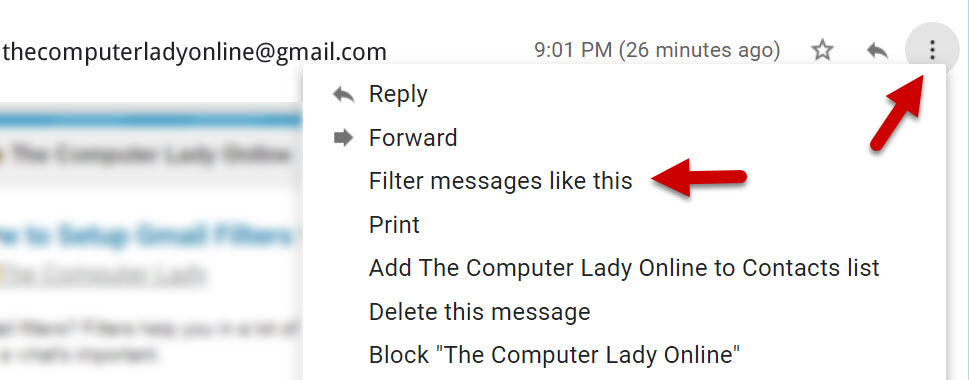
- Open the email.
- Click the 3 dots at the top right.
- Click Filters messages like this.
- Follow the steps above to create a filter.
Test Your Filter
Now that you created a Filter and a Label, how does it all work? The next time you receive an email from that email address you added at the beginning of our lesson, it will go into the label you created.
Labels are basically categories. They appear on the left side of your screen in the menu area.
If there were existing emails from that email you address you added when you created the filter, and you clicked “apply to existing”, you should be able to see them on the categories menu on the left side now. Take a look.
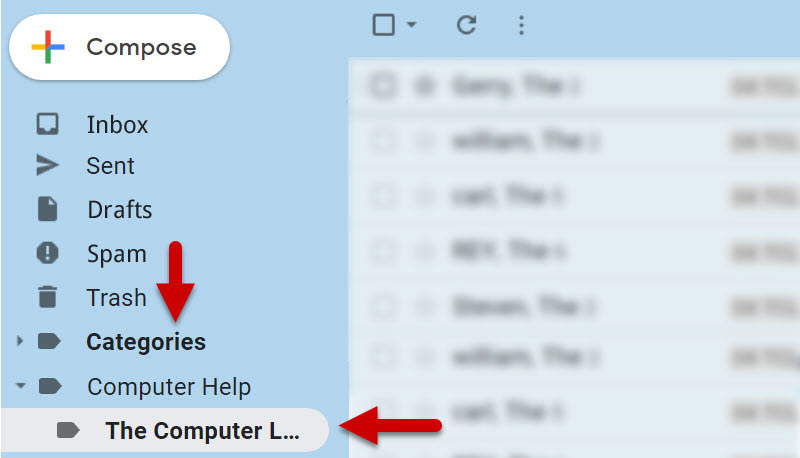
You can test your filter by having that person send you an email and watch to make sure it goes directly into the Category you made.
There are lots of other things you can do with Gmail filters. You just have to try all of the different options when you Create the filter.
You can also do these things with Gmail filters
- Put a star by an email to show it is important.
- Forward an email that comes in to another person automatically.
- Delete emails from someone automatically.
- Send that email a canned message.
- and lots more
That’s the beauty of Gmail filters. It’s personalized to how you use email.


Leave a Reply